Mac OS X Installation
Posted on Wed 30 July 2014 in R-course
I have developed a Zen-like approach to the operating systems that people use: 'When you're ready, the right operating system will appear in your life.' ~Guy Kawasaki is the chief evangelist of Canva, an online graphic design tool. Formerly, he was an advisor to the Motorola business unit of Google and chief evangelist of Apple.

Dev Environment
A development environment is one where you can make the software you need to run. You need this to run the latest free software which is often only implemented in source code. Particularly to take advantage of common mathematical libraries you need a Fortran, C and C++ compiler even if you never use those languages directly. Apple does not include it in their default configuration because it does not want you to create your own software, it want you to buy their software products (rant over).
Obtain the compilers
First you need to make sure that you have the latest operating system. To do that, you need to left click on the Apple icon and read the release.
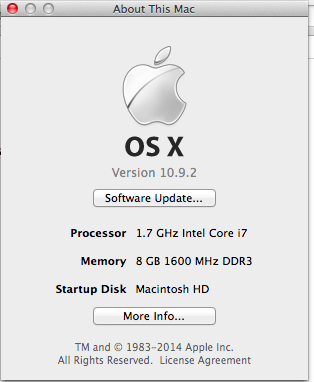
Then we have to obtain an appleID including submitting a credit card. The good news is that they won't charge you. We just need to obtain the xcode which has Apple's development tools. The only ones I have ever used are the compilers which are FREE software. Bottom line is, legally they can't charge for them (copyleft). Search in Google for "xCode download". It will automatically detect your OS and if you have Mac OS X installed, it will include the free button you need to press to download it.
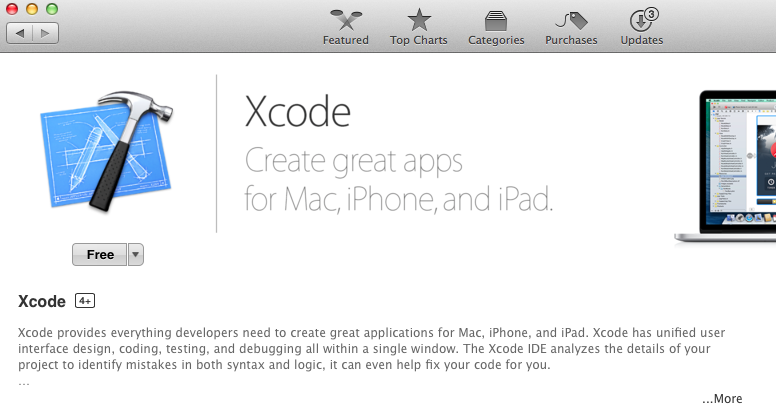
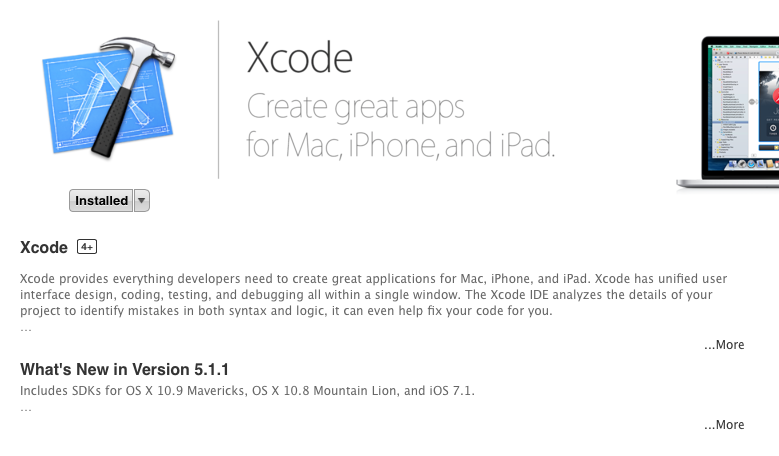
When it finishes downloading it will automatically install and and you will see the picture below. The only difference is a small button which now says installed. (Yay!)
If you have any trouble sounding condescending, find a Unix user to show you how it's done. ~Scott Adams
Obtain an alternate windowing library
The next step is to download the xQuartz project which let's the free software on your machine open new windows. Software needs to open new windows if it needs to warn you about something so this is an essential function. You can find it at this xQuartz link. The file is a dmg. Since this is not an official Apple product it will be saved in downloads. Here is a link that explains in detail how to install a dmg file. A dmg is disc image file. You need to left click on it. That will open an empty box. See picture below. Double click on the box and that will start an installer. You will need to put in your password. Also see picture further below.
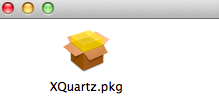
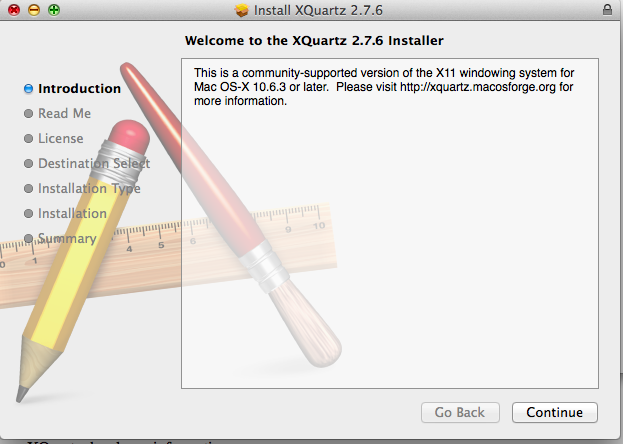
You have to log back in and out for xQuartz to take effect.
Obtain a package manager
Most distributions of Linux come with a package manager to sort out which software depends on which other libraries. These were a huge innovation in the Linux world. And there is a package manager for Mac OS X. It is called Homebrew. To install it we are going to need the terminal which is hard to find on a Mac. You need to left click the launcher icon. See picture below.

Then you need to find the terminal. It is hiding in the other icon. See the picture below and left click the similar image on your Mac.
![]()
Then left click the terminal icon, pictured below.
![]()
Now copy the Homebrew installation script (using command-C to copy and command V to paste) and paste it inside the terminal as pictured below:
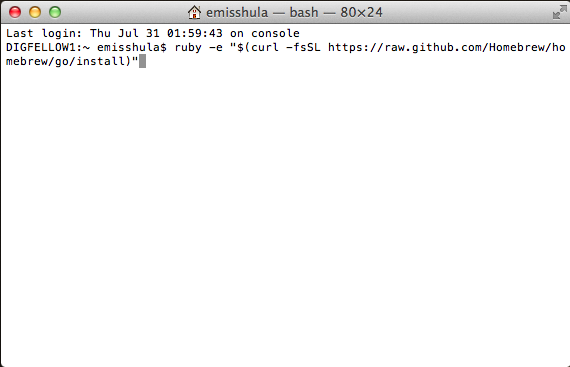
Now press the [enter key]. You will be prompted for your password. When
Homebrew finishes type brew doctor at the prompt. If all goes well
you will get a positive message. As Zed Jones points out, we still need
to manually set the path. In the terminal type:
sudo emacs /etc/paths
You will have to change the file to look like this:
/usr/local/bin
/usr/bin
/bin
/usr/sbin
/sbin
Type Ctrl-x Ctrl-s to save it and Ctrl-x Ctrl-c to quit.
Obtain git
The first thing we need is git. Git is the source control and collaboration software that is most popular in the FREE software world. Type
brew install git
Obtain emacs
In order to be able to manipulate the files that contain our data and present our output, we need to obtain our editor, Emacs.
brew install emacs --cocoa
Here again there are some quirks. On Linux, we would simply use the
Emacs package manager but on Mac we have used the package manager
Homebrew so the Emacs package manager gui install button won't install
because of permission problems. So we have to use the command interactive
commands from Emacs. No big deal, once you figure it out but it took a
while to find it. I found this post helpful. So we need to set up the
Emacs repositories by creating a .emacs file. Any file with a '.' in front
is a hidden configuration file. It will not appear when you type ls for
list files at the command prompt. You can edit them in Emacs C-x C-f .emacs.
Now we have to add the code below. (Used Command-C to copy it and Ctrl-Y
in Emacs to paste/yank it.
(require 'package)
(setq package-archives '(("org"       . "http://orgmode.org/elpa/")
                         ("gnu"       . "http://elpa.gnu.org/packages/")
                         ("melpa"     . "http://melpa.milkbox.net/packages/")
                         ("marmalade" . "http://marmalade-repo.org/packages/")))
(package-initialize)
Now just after this we can specify a programmatic way to check which packages are installed.
(defun filter (condp lst)
  "Emacs Lisp doesn’t come with a ‘filter’ function to keep elements that satisfy
a conditional and excise the elements that do not satisfy it. One can use ‘mapcar’
to iterate over a list with a conditional, and then use ‘delq’ to remove the ‘nil’
values."
  (delq nil
        (mapcar (lambda (x) (and (funcall condp x) x)) lst)))

(defun inverse-filter (condp lst)
  "A filter function, but returns a list of the entries that don't match the predicate."
  (delq nil
        (mapcar (lambda (x) (and (not (funcall condp x)) x)) lst)))

(defun packages-install (packages)
  "Given a list of packages, this will install them from the standard locations."
  (let ((to-install (inverse-filter 'package-installed-p packages)))
    (when to-install
      (package-refresh-contents)
      (dolist (it to-install)
          (package-install it)
      (delete-other-windows)))))
Emacs package to get the right environment
Now the first thing we should do is correct for another Mac induced problem. An Emacs instance started from the graphical user interface will have a different environment than a sell in a terminal window. This happens because OS X does not run a shell during login. If the environment is different you will get weird behavior when Emacs calls external utilities like make.
M-x package-install RET exec-path-from-shell-initialize
Then in the .emacs file add the following code:
(require 'exec-path-from-shell)
    (when (memq window-system '(mac ns))
    (exec-path-from-shell-initialize))
At this point quit emacs C-x C-c and restart.
Emacs package to get the communicate with R (ESS)
Here again type M-x package-install RET ess RET. This will
install ESS. Find the .emacs file by typin C-x C-f .emacs
and add the following code.
;;ess-mode configuration
(setq ess-ask-for-ess-directory t)
(setq inferior-R-program-name "/usr/local/bin/R")
(setq ess-local-process-name "R")
(require 'ess-site)
Install R
Another weird quirk is that xCode has removed gcc which is the most common set of compilers in the world. They are what R expects to encounter. There are two alternatives. You can build a late version of the compilers via the instructions found at this link
brew install [flags] https://raw.github.com/Homebrew/homebrew-versions/gcc48.rb
Where [flags] should include all the required languages, e.g. (–enable-cxx –enable-fortran). Also see this link for an example of how to create a symlink to make a newer version the default. However I got away with just installing version 4.2 (a seven year old version of the gcc compilers by installing XCode Command Line Tools. These are separate from XCode which I found confusing. You can install them with xcode-select –install). Then you can just type
brew install gcc
Now that gcc is installed you can install R.
brew tap homebrew/science #the R formula has been moved here
brew install r
You can test the installation by typing M-x R in Emacs and
you should have R inside of Emacs. Next post will get Python
set up. I am betting our 4.2 version of gcc is not going to
be good enough.
Dedication
This post is dedicated to Matt Gold and the GC Digital Fellows project who were able to obtain for me not only access to a Mac but insured that I would have admin rights to install software and create this tutorial. They bare no responsibility for any mistakes or omissions which are solely the responsiblity of the author.